Wednesday, November 30, 2011

Sewing Tute: How to Make Easy Burpees

Now, let me first start by saying that no...there is no bun in the oven please. I am not even married (yet!).

Before I purchased my sewing machine, of course I did the right thing and researched on the Internet the things I could make with it. And one finds very quickly that baby/children things are in abundance. They are not only easy to make but can be very forgiving which is handy for beginners like myself.

I am slowly being surrounded by procreating women and these *burpees not only make wonderful, personalised baby shower gifts but also serves as an excellent first project for the beginner sewer.

So here is my step-by-step of how to make a burpee. I just combed the Internet for tutes and combined it all to make it my version.

*burpees aka burp coths: just like other humans, babies love watching the world go by and enjoy being propped up against the shoulder. But like every other baby, they do drool and have the occasional spit up. These are just prettier versions of the terry towel or whatever mothers use nowadays to protect their shoulders!


1)Start out by cutting your cloth into 30cm x 45 cm pieces.

As you can see from my picture, I cut the flannel a little larger than the muslin. I find that easier for me for some reason. The excess I will trim off later.

I had planned to use muslin for the top and flannel for the bottom as I've read that real life mothers have claimed that flannel seems to adhere better to a clothed shoulder and doesn't tend to slip off.

Just bear in mind that you want something soft for the top fabric (think of those chubby cheeks!) but also absorbent enough.

*Do invest in a pair of specialised cloth cutting scissors. I was reluctant at first but Leng talked me out of it and this $20 dollar pair cuts through cloth like butter! Definitely a must buy for all beginner sewers!


2) Iron your fabric out. This step is essential for beginners. It just makes life simpler!

*My ironing board cover says, "IRONING BORED" :):)


3) Place your fabric correct sides together (as you will be turning these inside out later on).

4) Pin the 2 pieces of fabric together, making sure you leave a gap of 7-8 cm on one side. This is the gap where you will be putting your hand in to turn the burpee inside out.


Picture of my pinned gap. The pins are essential for the beginner as you will find out!
Just be sure to remove the pins as you sew! Some machines come with a presser foot that allows you to sew directly on top of pins but I don't think my little machine can.


5) Sew right round with a simple, straight stitch (I used the Number 2 on my machine), but remember to NOT sew the gap which we pinned out earlier.

I normally start at one end of the gap and go right round to the other end of the gap. Remember to BACKSTICH (You Tube this) on starting and ending. I think this is so your entire burpee doesn't end up unravelling at the seams!

6) Cut away any excess cloth.


7) Clip all 4 corners. Just don't clip them too close to the seam. This is before...


And this is afters....


And why do we clip them you ask? To get a lovely looking corner! :)


You can aid your corners further by using the blunt end of a chopstick or eraser on the end of a pencil to gently push the corners out. It really does make a difference!

9) The final step is to iron out your burpee and tuck the excess fabric in at the gap and then topstitch all round the burpee, remembering again to backstitch at the start and end (sorry but I didn't take any pictures here!)


Tadaa!! And you have a burpee! This is my first ever burpee and I made it under 20 minutes!


Here is my complete set! I had originally wanted to give them out as Xmas presents but babies grow up so quickly that there might not be any use for them when I gift them!


Tuesday, November 29, 2011

Review: Brother Sewing Machine XL 2220

I thought I'd do a quick review seeing there is more than one woman out there on the brink of wanting to experiment with a sewing machine. Please however take this review with a pinch of salt because I have only used the machine to sew ONE thing (a burpee!!! Tutorial on that coming up real soon!).

There are MILLIONS of sewing machines out there and I was told by a fashion designer friend that Singers and Janomes were the way to go. Also, she advised that I wouldn't be needing one with an overlocker function (whatever that was!).

But when I saw Spotlight having a sale on this particular Brother machine, I knew it was the one. I read up a couple of reviews and it was nothing but good. Please bear in mind that I was after a Beginner's Sewing Machine and I knew that I wasn't going to venture into the sewing-my-own-dresses realm. More like sewing-small-projects-as-a-hobby kinda thing.

I've decided to dot point out why I have fallen in love with my sewing machine. Hope this helps you ladies out there trying to search for The One of your own :)

1) It's lightweight and compact.

Some reviews say plasticky machines are not great but for I love it that I can just plop it wherever I like. Think iMac versus Macbook Pro....you get the picture :)

It's small enough to just sit in the corner of your table underneath it's cover and lightweight enough to move around the table without it being a hassle.

2) It's so easy to use.

This may apply to any machine you get but the manual it came with combined with a little bit of You Tubing prior and you are literally ready to go.

3) The price was right

This was the biggest factor.

I have to be honest here and say that I could as quickly fall OFF of the sewing bandwagon just as quickly as I fell ON it. In this current fiscal climate of ours, I am trying very hard not to waste not, want not (oddly contradicted by me purchasing this machine in the first place!).

But I was really eager to learn something new. I figured if I could sew up womens' perineums, I could just easily teach myself how to use a sewing machine!

So when I saw this machine on sale with a saving of $140 dollars, it was in the bag so to speak :)


I dragged Leng back to Spotlight for a second time and he not only carried around rolls of fabric for me but also scouted out these accessories: extra bobbins, pins and a dedicated cloth only pair of scissors which is essential!

I suggest buying fabric on special for your first few projects as invariably, the first few things you sew will be in lack for better words...kinda crappy. I found flannel on special for $1.30 a metre and Leng requested I make him a pair of pyjama pants so we also got elastic waist bands and the cream coloured velcro are for potential baby bibs :)


My machine comes with 3 buttonhole sewing thingys and 10 different kind of stitches which I thought was sufficient for me. Just make sure you can sew buttonholes on yours too.


I love the little focused light!


It comes with a very lightweight, non-cumbersome pedal which can be easily stored away when not in use.


That little triangular piece you see next to the on/off button is the backstitch button. The sewing world has an entire new language and after awhile you will figure out what words like "bobbins, foot press and backstitch" are!


You can see how much thread you have left on your bobbin through the clear plastic.


The machine has a little accessories drawer which contained all of these in that white pouch. I have NO idea what they are meant for besides the extra 3 bobbins.

Friday, November 25, 2011

I Bought A Sewing Machine!

I think the title says everything but I've been perusing a lot of DIY blogs lately due to a certain looming "project" and suddenly had a huge urge to learn how to sew!

Let me first say that I have absolutely NO IDEA how to use sewing machines. The only sewing I did was when I was 12 and back in primary school. And that was basically just sewing little x's on to this checked cloth to make patterns. Mine was a bright sunflower yellow and cream cloth and I was terrible at it! I believe I got a "C" for it!

But I figured half of China was sewing just fine so honestly, how hard could it be right? I've got the fabulous Internet as my teacher and my love for Spotlight rekindled...Sewing 101 here I come!

NB: Spotlight is currently having a fabulous sale on the sewing machine I got. It's the Brother XL 2220 which retailed at $299. You get $100 off plus you get another $40 off with the VIP voucher (you just have to sign up as a VIP Spotlight member which costs nothing) so all up it will cost you a whopping $160 which I thought was a pretty good deal for a beginner sewing machine.


My dear Grand Aunty was a seamstress and to this day, her vintage Singer sewing machine is still at my parent's house. I remember her doing things like having to oil it, moving the lever of the presser foot up and down, and of course that fabulous movement of her feet on the vintage pedals below. I wonder if her heavy, black sewing scissors are still at my parent's house (I remember her telling me it could only be used to cut cloth and nothing else) as I would love to have them with me, to serve as a fond memory of her whilst I attempt to sew...


These pictures were taken at 11pm at night. We got home and I unboxed my new toy immediately! The instructions in the accompanying manual is actually pretty clear although, you missed the bit where Leng threaded and filled my bobbin for me! I threw a little fit because I wanted to do it myself (his mother was a seamstress and apparently he picked a few tips when he was a little boy!).

Monday, November 7, 2011

Monday Night DinDin

Well, whaddaya know...the Weber has done it again.

A simple dinner of fresh garden salad with grilled corn on the cob and asparagus and sticky chicken wings.

Cat's Sticky Chicken Wings
------------------------------------

Ingredients:
---------------
Marinade chicken wings overnight in:
- minced garlic
- Kikkoman soya sauce
- tomato sauce
- HP sauce/Worcestershire sauce
- white wine
- sugar
(I don't measure anything here. There is something about just strewing everything together till it looks good!)

Method:
----------
1) Grill for 15- 20 minutes in the Weber or roast in oven.


The chicken wings were so moist and juicy! I really think it is due to the Weber's ability to BBQ and roast at the same time (remember, it cooks with it's lid down) that makes it such a keeper.

Sunday, November 6, 2011

Simon Hopkinson's Out-Of-This-World's Capsicum Stuffed With Tomatoes

There is a new British cook lurking on ABC 1 this month. He may not be as debonair as Jamie Oliver but his TV series The Good Cook is straightforward, good home cooking.

Most of his recipes are good ol' favourites which I've already picked up (and perfected) from Mr Oliver and Ms Lawson but here is one that Leng said we absolutely MUST try and OMG...it's as the Brits would say, gobsmackingly delicious!!

VERDICT: 11/10 You know Summer is here when the sweet roma tomatoes are in abundance and capsicums are on special at the markets. When paired together in this dish and enhanced further by the garlic and basil, their flavours literally blow your palate away! I beg of you to try this at home. This certainly has to be our favourite dish this year!

Simon Hopkinson's Roasted Red Capsicum
-----------------------------------------------------------

Ingredients:
--------------
Red capsicum (1/2 per person)
Tomatoes (any sort)
Garlic - sliced
Anchovies - out of a jar. I use amazing Aranoa Spanish anchovies from Essential Ingredient. They are on the pricey side but so worth it!
Fresh basil leaves, torn

Method:
----------

1) Half and deseed the capsicum and lay it in a roasting tray
2) Put sliced garlic ( as much as you like) in each capsicum cup and sprinkle a little salt and ground black pepper in each capsicum cup.
3) Using the tip of the knife, prick the tomatoes randomly (this will aid peeling their skins off later) and put them in a pot. Pour boiling water over them and cover. Leave for a few minutes.
4) Peel tomato skins off and stuff into capsicum cups.
5) Drizzle extra virgin olive oil over stuffed capsicum and roast in oven/Weber BBQ for 15-20 minutes
6) Before serving, criss cross anchovy fillets over the capsicum and torn basil leaves on top.


We had an impromptu dinner for 4 guests last night and whipped this up for them for which they all loved! So easy to make yet such amazing flavours.

Thursday, November 3, 2011

Review: Weber Q 200 (gas)

You know when you have become truly Aussie-fied when you go out and purchase a BBQ!

Oddly, despite the all-year-round warm weather back in Malaysia, the locals there don't view toiling over heated coals outdoors as anything particularly pleasant. Leave it to the hawkers and to my local satay man they will say.

Perhaps it is the cooler weather in Australia or just mere fact that in true Caucasian style, they prefer the outdoors but owning a BBQ in the backyard is a very Aussie thing indeed. Throw in a man complete with tongs in one hand and stubby in another and you've got yourself the typical Aussie weekend.

I cannot remember how or why Leng and I decided to go looking for a BBQ but search we did. We searched all the internet BBQ forums and found that there was an Aussie fan base of the very American brand of barbecues (or as the Yankees call it "grills") i.e. Weber, in particular their very portable Q range.

If you are a BBQ novice like me, you will probably not know that the Webers cook with their LID DOWN. That's right. Dismiss all the pictures of yourself marsh mellowing away because one has to close the lid and simply walk away and allow the food to cook itself.

You may think this as odd and not for you (which Leng and I initially thought too) but we took the plunge and really, this entire cooking with the lid down is really rather liberating!

Firstly, there is much less smoke. Perfect for smoke-less hairs and clothes and small balconies.

Secondly, the BBQ is somewhat like a semi-grill, semi-oven so your food comes out cooked at a fraction of time.

Thirdly, our Weber uses a gas tank (you can easily get little 9kg gas tanks from your local petrol station) or you can purchase ones that use natural gas. If you have an electric oven like myself, you may just save that little bit by roasting chickens in the Weber as gas is much cheaper than electricity here in Oz. And yes, you can do an actual roast in it!

Finally, the Weber Q range is highly portable and smallish in size unlike those monstrous machines you see out in the suburbs. Handy for those of you that camp or have a holiday/beach house and perfect for balconies.

We are still getting to know our Weber but Leng who has owned a Weber BBQ that used coals previously, simply loves his new boy toy.

VERDICT: 10/10 Some people may not be able to comprehend barbecuing with the lid down on a gas BBQ but honestly, if you are after taste, efficiency and most importantly, something easy to clean up afters, this is what you are looking for.

Will I get the yummy, charcoal taste? Well, it is a gas BBQ with no coals in sight but you still get the smokey, BBQ flavour.

Will it be a hassle to clean up? Not at all. Be sure to purchase the Weber steel cleaning brush and all you have to do is use some elbow grease whilst the grill is hot and that's it. No water/soap needed!

Will the Weber get dirty out in the open/on my balcony? Not if you purchase the cover that comes with it. We also got the accompanying stand for it which has wheels attached to it so you could easily wheel the entire contraption in and out of say, your garage/storage area.

I am sold! Where do I get one? Leng and I highly suggest you wait till DJs has their 15% off BBQs and accessories because the savings you will get are pretty good and beat all other competitors (yes, we did our research!). Apparently Weber control their RRP so most retailers don't generally lessen their prices.

So what are you BBQing this weekend? :)


One just has to get used to cooking with lid down which really, isn't a hard thing to do. You just plonk all your food in, close the lid and literally walk away!


We baptised our new Weber with an impromptu dinner party for 4. Entrees consisted of a Rossini (Italian drink made up of champagne and pureed strawberries) and honeydew and prosciutto.


We had gorgeous grilled vegetables and sirloin steak from Prahran Market. I opted for the porterhouse cut just for comparison and the verdict is that the sirloin cut tastes much better.


The next night, we had grilled spatchcocked chicken and it only took about 20 minutes to cook. It got flipped once and that was it!


Sides (which we also cooked in the Weber) were roasted mushrooms, asparagus and this fabulous stuffed capsicum recipe which we saw Simon Hopkinson on ABC1 whip up and OMG! It was FABULOUS!!!! I will have to post a separate blog post just for that recipe because it was soooooo delish!


Finally, a picture of the boy with his new toy. He loves it, needless to say! I just don't get the entire Aussie boys and their BBQs but hey...at least I'm not doing the cooking this time!!! :):):)

Wednesday, November 2, 2011

Review: Sonic Wave's Ultrasonic Cleaner

So now I know why the boy was so eager in wanting to see if the post office was opened on Melbourne Cup Day (a public holiday here in the state of Victoria).

After my insistence that it wasn't, he STILL wanted to pull a drive past and well, whaddaya know - I was right. It was closed and we left clutching the little card notifying us to collect our parcel.

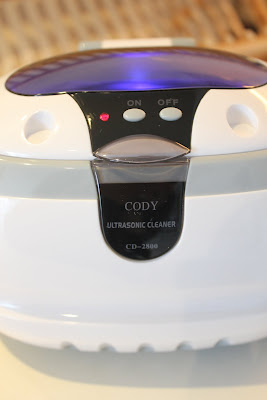
I meandered to the PO the next day and came home with this - an ultrasonic cleaner that the boy had purchased for me to clean my jewellery with (in particular, a certain shiny rock!) and boy, does this thing work!

VERDICT: 10/10 I was AMAZED that this product worked!!! I also loved the fact that it was compact and doesn't take up much room plus it looked like a cute little space shuttle. Bonus points also given for it's 3 minute timer.

For those of you without any bling to clean, let me just say that this little space shuttle also cleans eye glasses, dentures (???!!), electric shaver heads (and ladies, let's not forget our little shaver heads too!), ancient coins, badges, pen heads...the list goes on!

For those interested, I am guessing the boy purchased this little gem from the Internet. He did do a little research in it prior and the brand Sonic Wave got pretty good reviews plus it comes with a 1 year warranty.


I took this picture for size comparison purposes. And also to show off my latest purchase: a Samurai Wedgewood Sugarbox to your left which had a RRP A$69 which I got for A$14 at Harbourtown's Royal Doulton shop!!!


The cleaner emits this cute blue light whilst on standby and cleaning.


In goes my 12 year old watch...


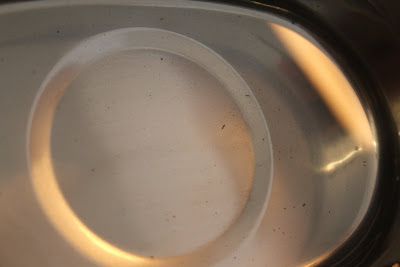
and out comes all this dirt after 3 minutes!!!


I was so amazed that I left the watch in for another 2 cycles and just look at the amount of gunk that came out! Eeeew!